Create a flow
A flow helps you visualize the path of actions taken by a group of actors.
You can view the discovery paths of all actors simultaneously, investigate the events of all actors on an individual path, or use information from a flow as input in a top-level query. In this way, flows provide you with the tools to track trends and determine projected user behaviors over time.
Creating a basic flow
Among their many uses, flows help you analyze actor engagement, conversion, and path discovery. This section demonstrates how to create a flow that shows the paths for users who purchased a movie.
To create a basic flow, do the following:
In the Scuba UI, click Data in the left navigation bar.
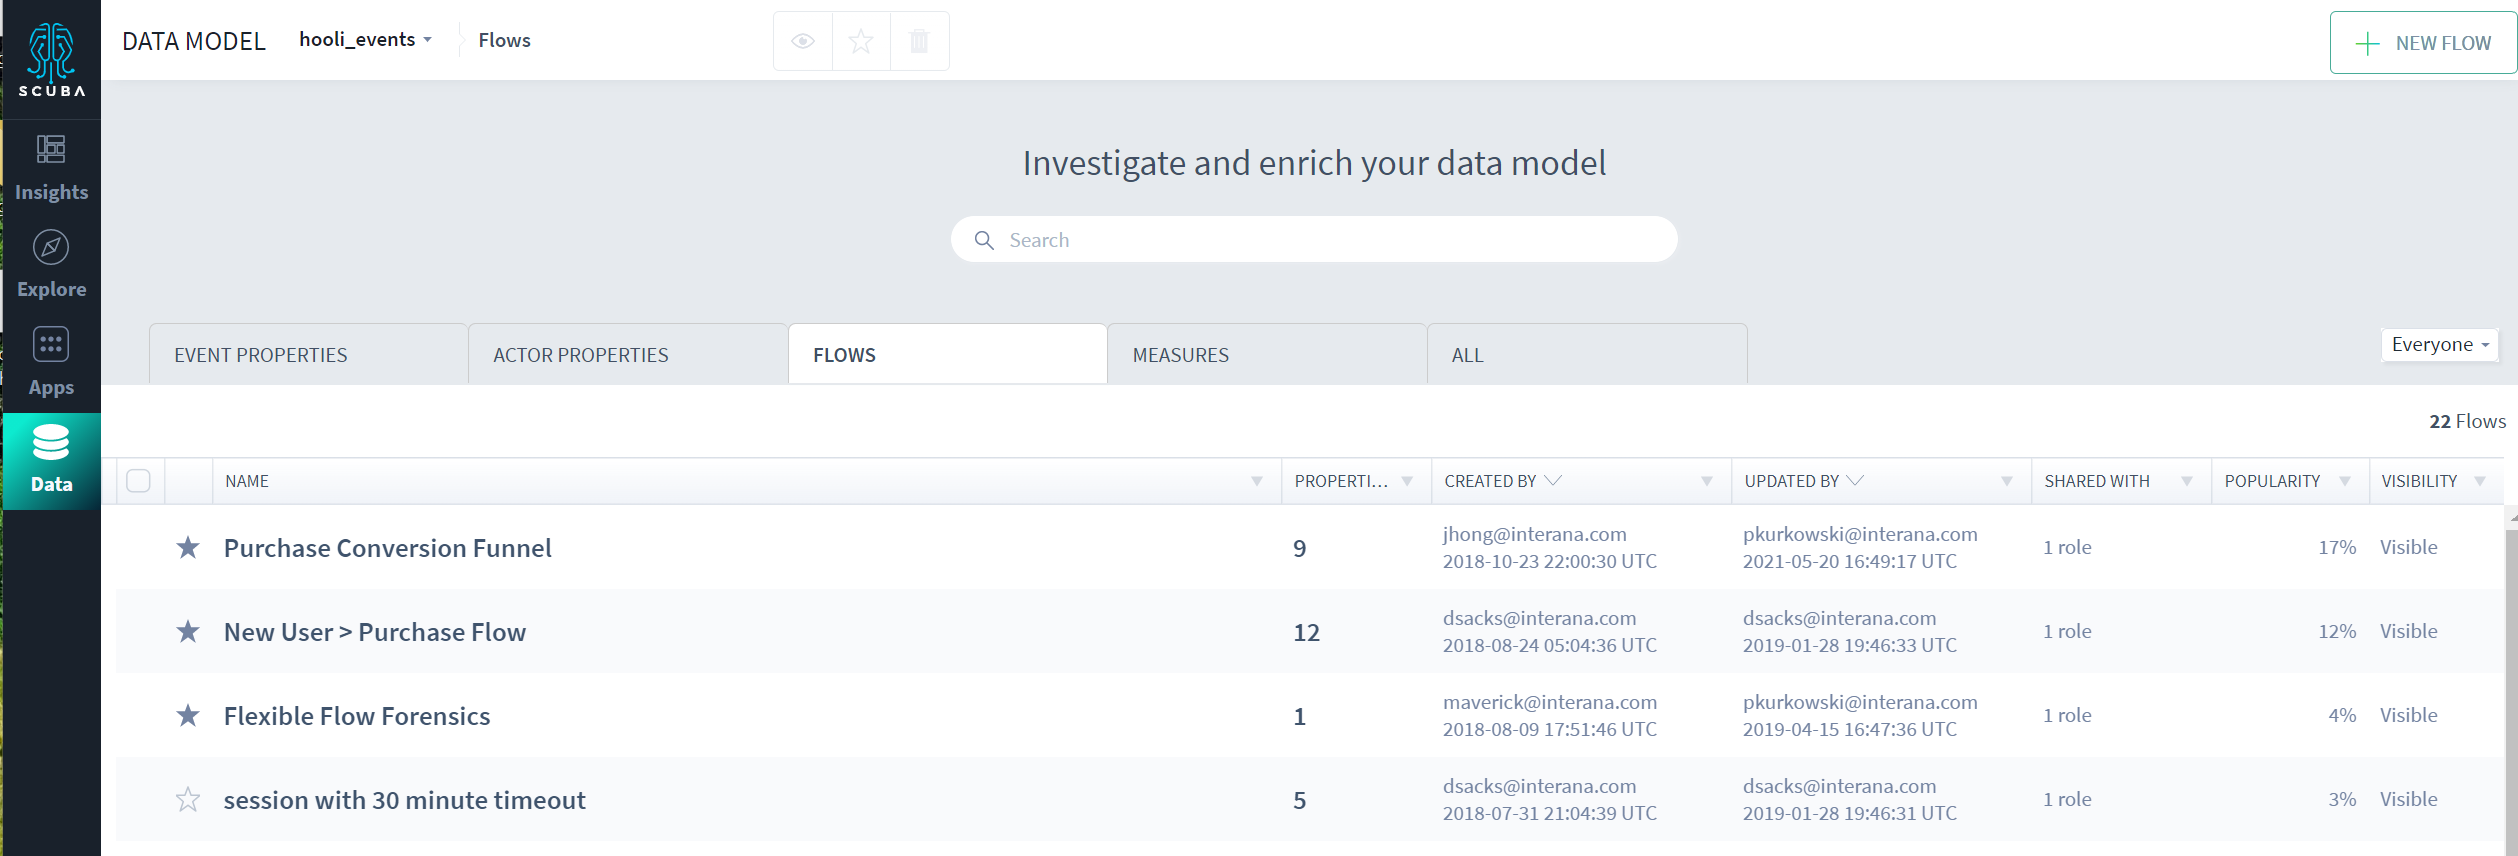
Click the Flows tab.
Choose a dataset from the dropdown list at the top of the window. We chose the hooli_events dataset for our example. The options available to you will reflect your data.
In the top right corner of the window, click +New Flow.
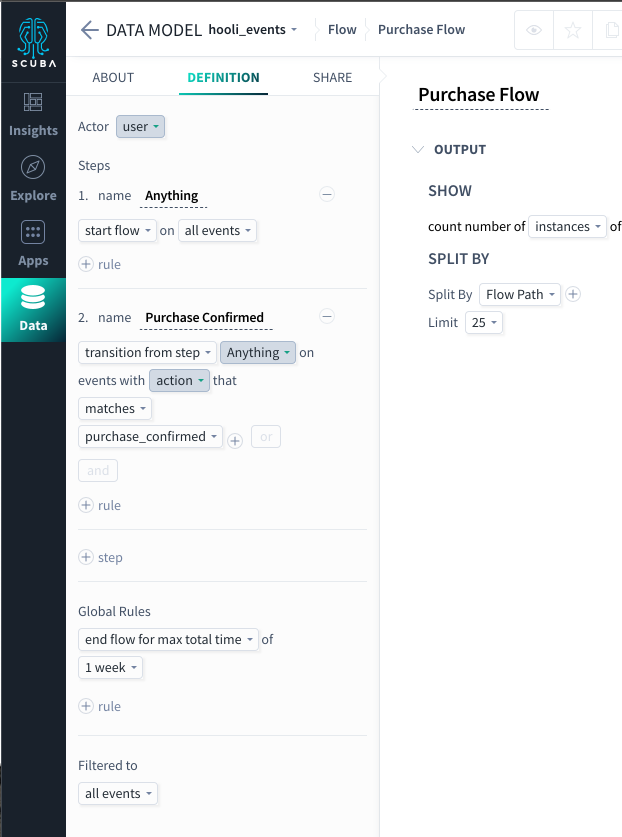
Enter a name for the flow at the top of the page.
In the Definition tab, select an Actor from the drop-down list. We chose user for our example.
Enter a descriptive name for Step 1 and select a filter from the drop-down menu. We entered Anything for the name and accepted the default filter all events.
Enter a descriptive name for Step 2 and select the appropriate filter options from the dropdown lists. We entered Purchase Confirmed and click on all events to select events with action that matches purchase_confirmed. See Understand flow definition conditions in the User's Guide for more information.
Optional: Add another step, enter a step name, and selecting filter options.
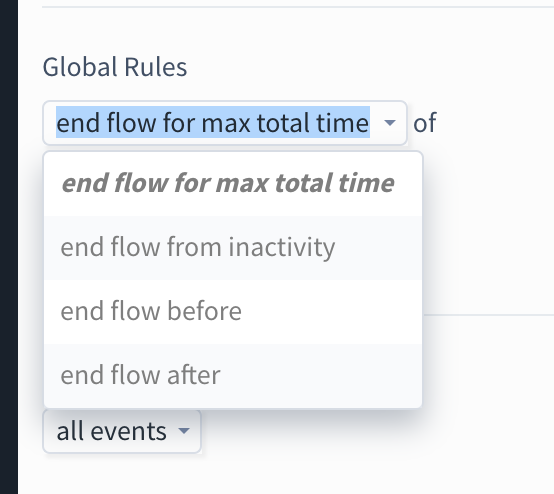
To end the flow, click the minus sign next to the last, empty step, and scroll down to Global Rules.
Select end flow from inactivity and enter or select a time interval.
Enter or select an end flow for max total time option.
Specify Filtered to pre-filter values, or accept all events as we did for our example.
Click GO to preview the flow. The results appear in the window on the right. Note that the gray segment denotes the population that dropped off. These are flow instances that satisfied one of the flow end conditions (inactivity of 30 minutes or max total time of 1 week) before they were able to reach the "Purchase Confirmed" step. It follows that only the smaller line on the bottom denotes the population that had a confirmed purchase.
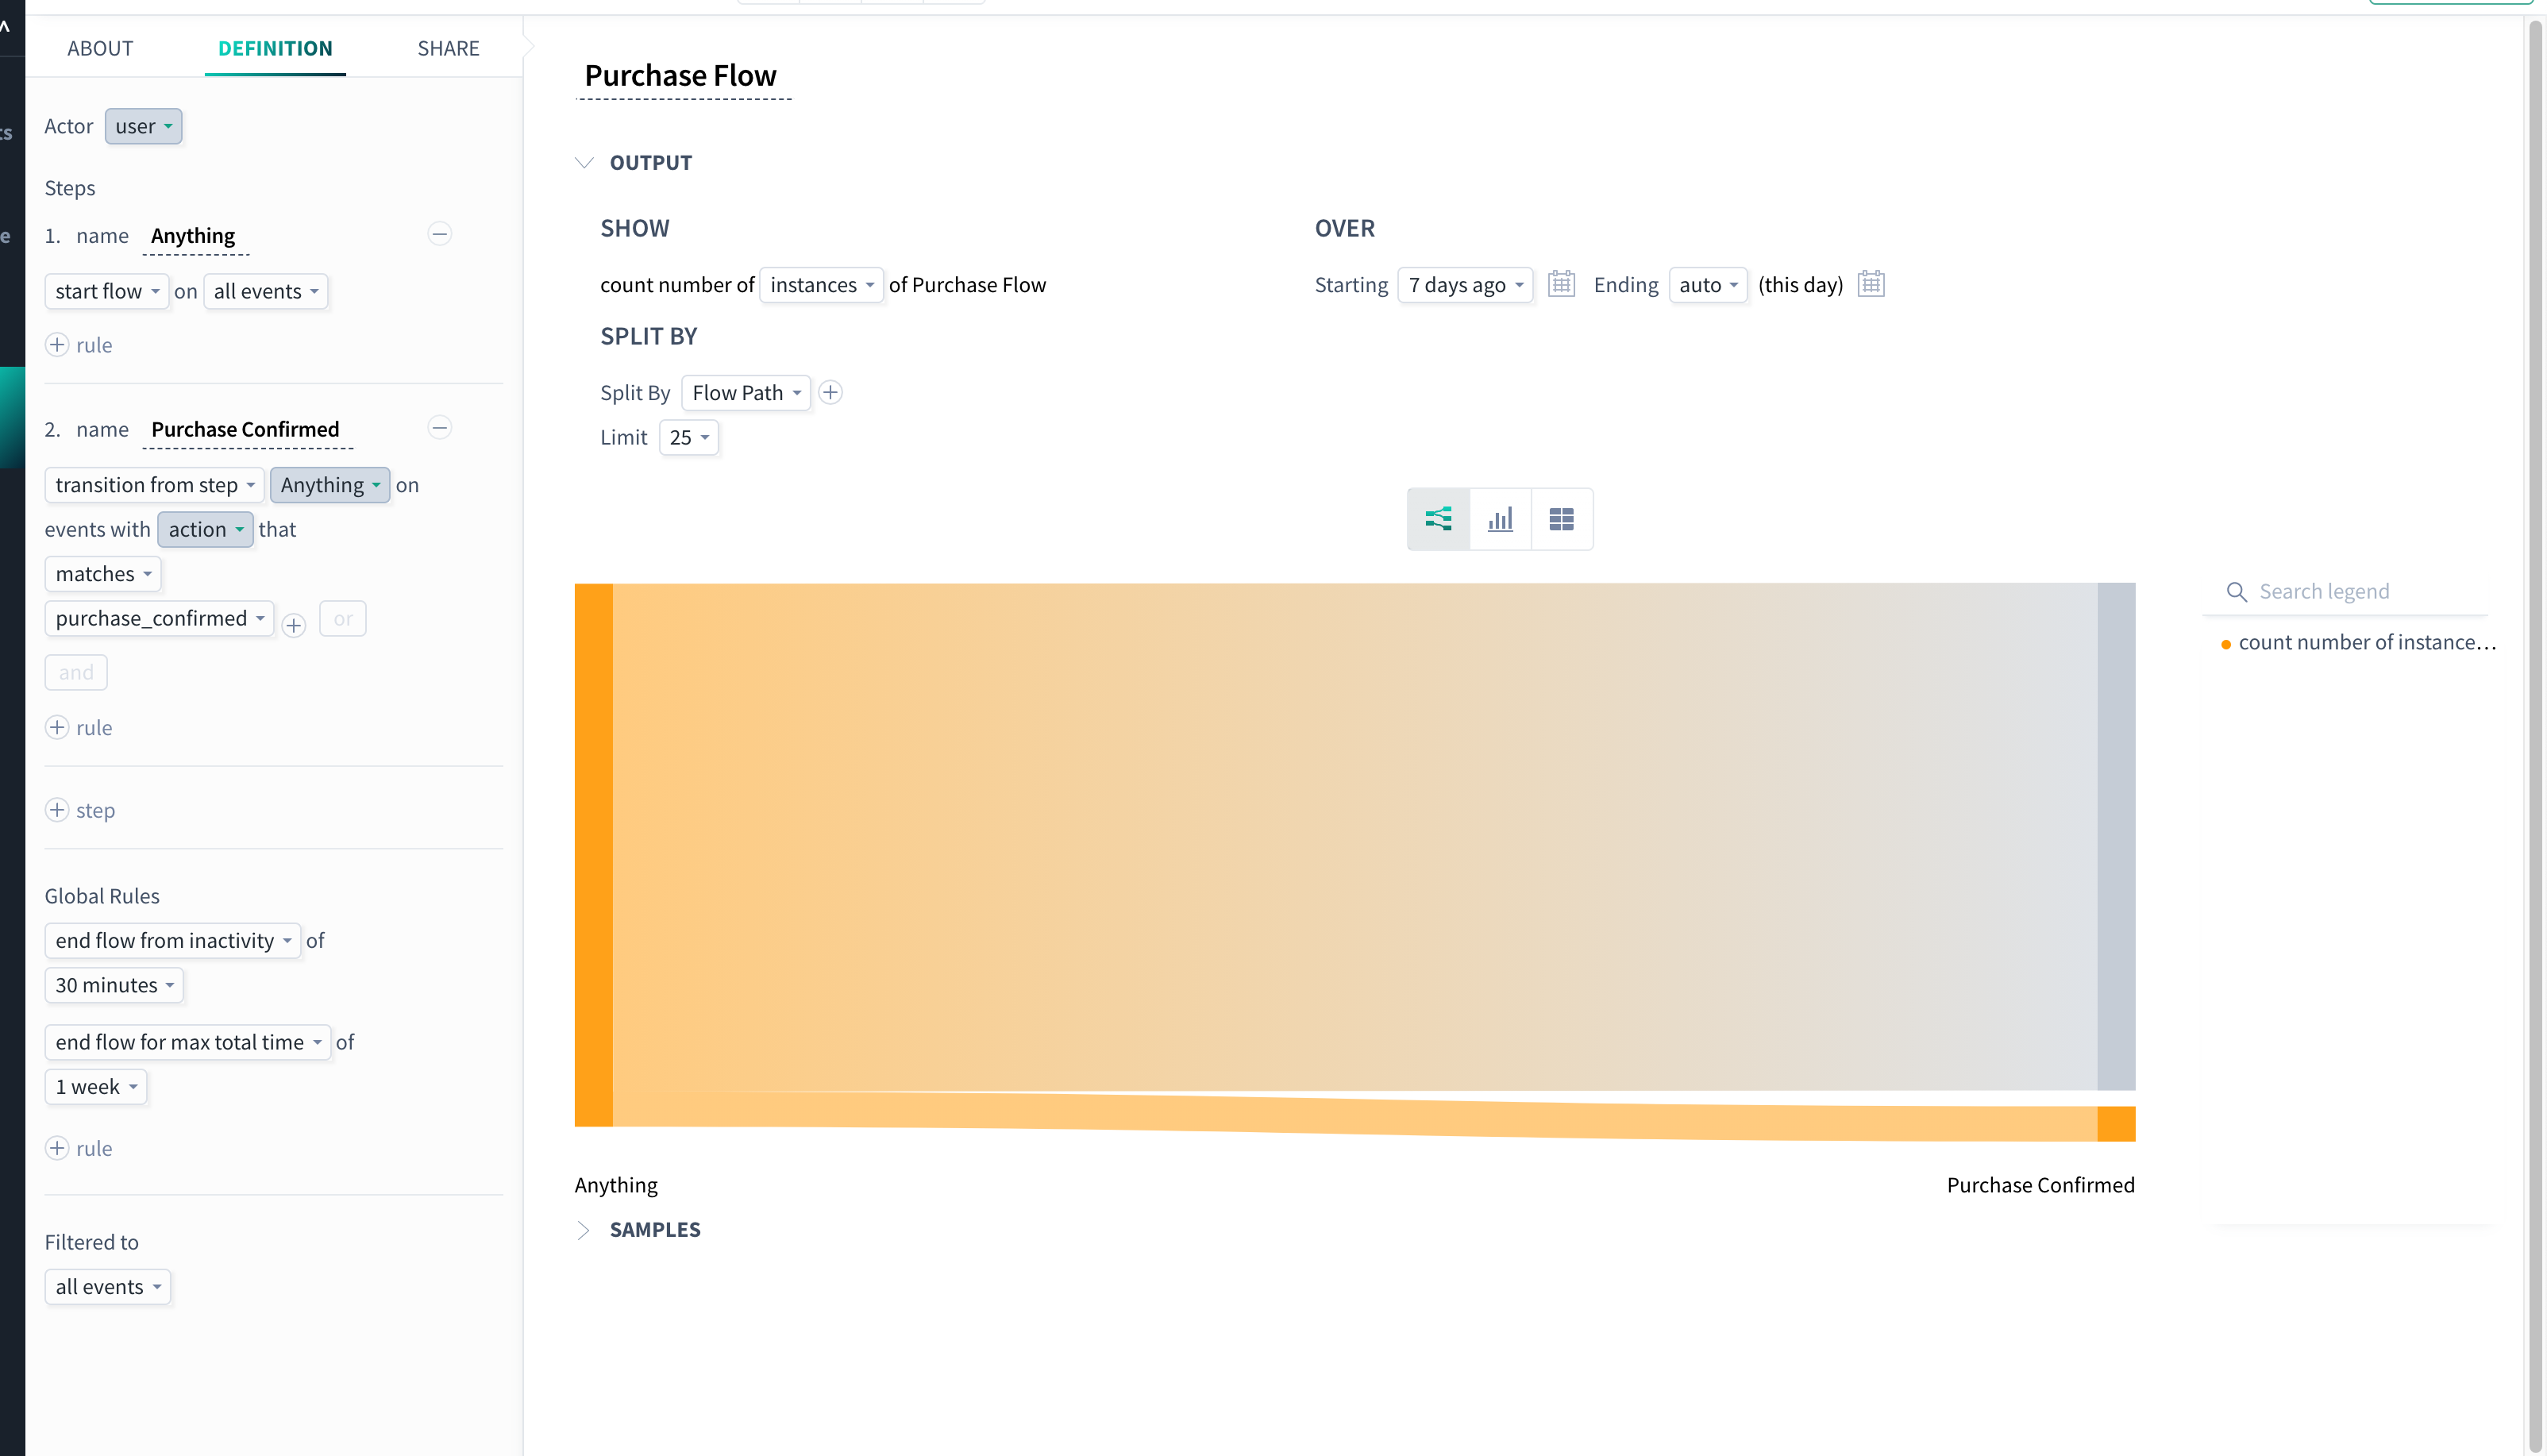
Optional: Split by an additional quantity to compare user paths leading to a movie purchase. In the results pane, next to Split by Flow Path, click + to access the dropdown.
What's Next
Now that you've created a basic flow, you're ready to analyze the results.