Add ADFS authentication to your Scuba instance
Before you start...
Make sure you've spoken with your technical account manager to determine which authentication provider best fits your needs. Your TAM will also give you two pieces of information that you will need before you start: the Sign-On URL and the AppID.
Microsoft ADFS Configuration
Now you're ready to set up your ADFS application!
Create a New ADFS Application
Log in to the Windows Domain Controller
Open Start > Administrative Tools > AD FS Management
Click on Trust Relationships > Relying Party Trusts
Click Add Relying Party Trusts
At the Welcome screen, click Start
If there is a certificate, browse it
Leave the "Configure URL" fields empty, and click Next
Under Relying Party Trust Identifiers, you will need to enter two URLs that depend on the DNS of your Scuba instance:
https://< Scuba Instance DNS >/api/metadata
https://< Scuba Instance DNS >/api/metadata/<AppID>
For example, if your Scuba instance is at https://dianescoolcompany.scuba.io and your AppID is adfs, you should enter:
Choose not to configure multi-factor authentication, then click Next
10. Select "Permit all users access to this relying party," then click Next
11. Click Next again to complete the application setup process
Add Endpoints
Now you need to add two endpoints to your new ADFS application.
Double-click on your new ADFS app to show its properties
Click on EndPoints, then click Add
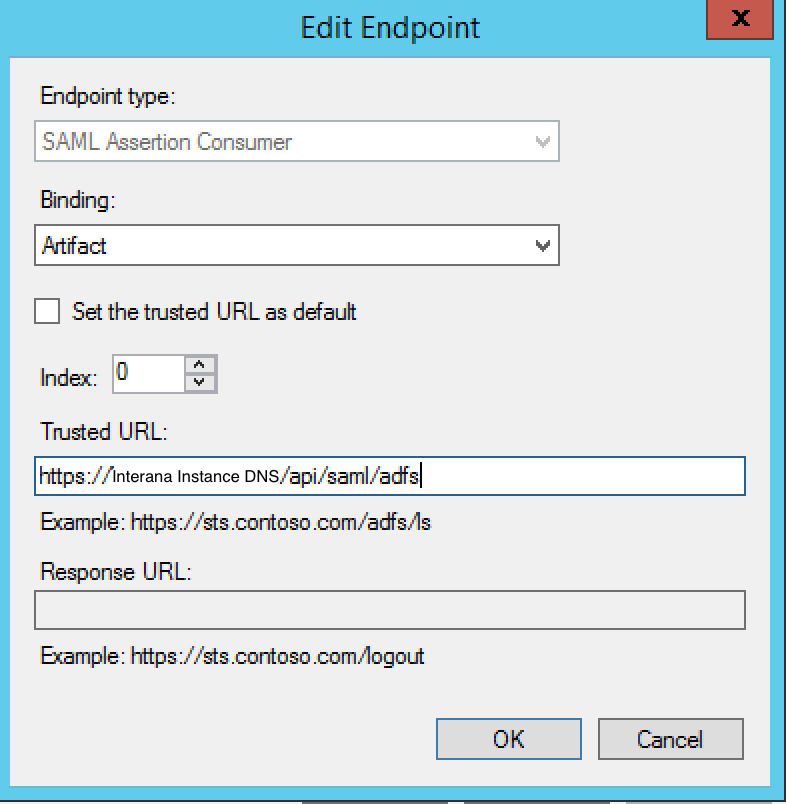
Configure your first endpoint by setting Binding to Artifact, Index to 0, and Trusted URL to the Sign-On URL that your TAM gave you. Click OK to finish.
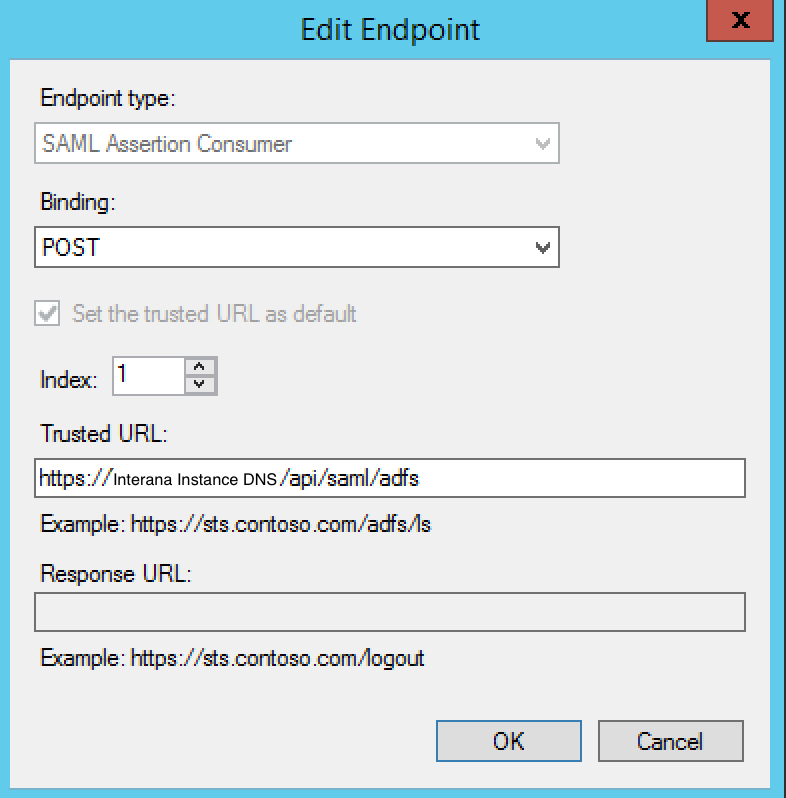
Click Add again to add a second endpoint. For this one, set Binding to POST, Index to 1, and Trusted URL to the Sign-On URL.
Click OK until you've closed the Properties for the new Relying Party Trusts
Edit Claim Rules
Now we need to add two claim rules to our application.
With your new Trust still selected, click Edit Claim Rules
Click Add Rule
The first rule we'll add is a Get-Attribute. Select "Send LDAP Membership as Claim" from the dropdown, then click Next. Next to Claim Rules, fill out the fields based on this screenshot:
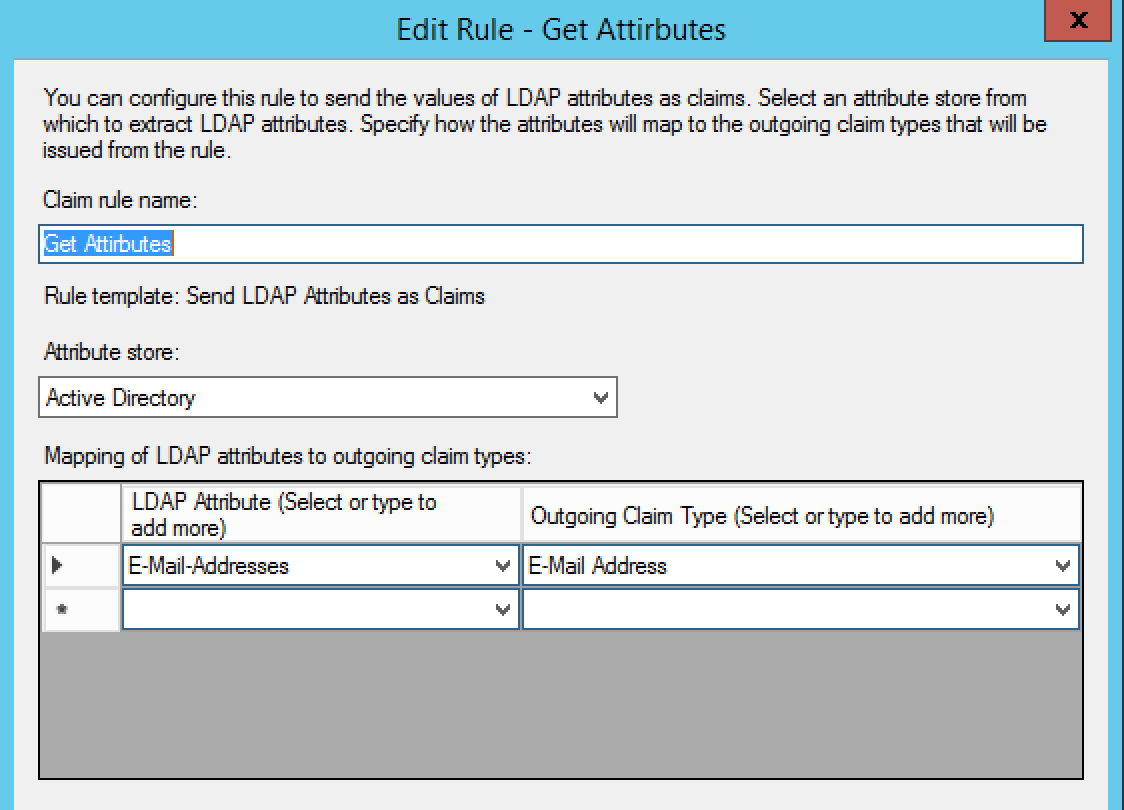
Click Finish
Click Add Rule again to add the second rule
Under "Claim Rule Template," select "Transform an incoming claim"
Fill out the information according to this screenshot:
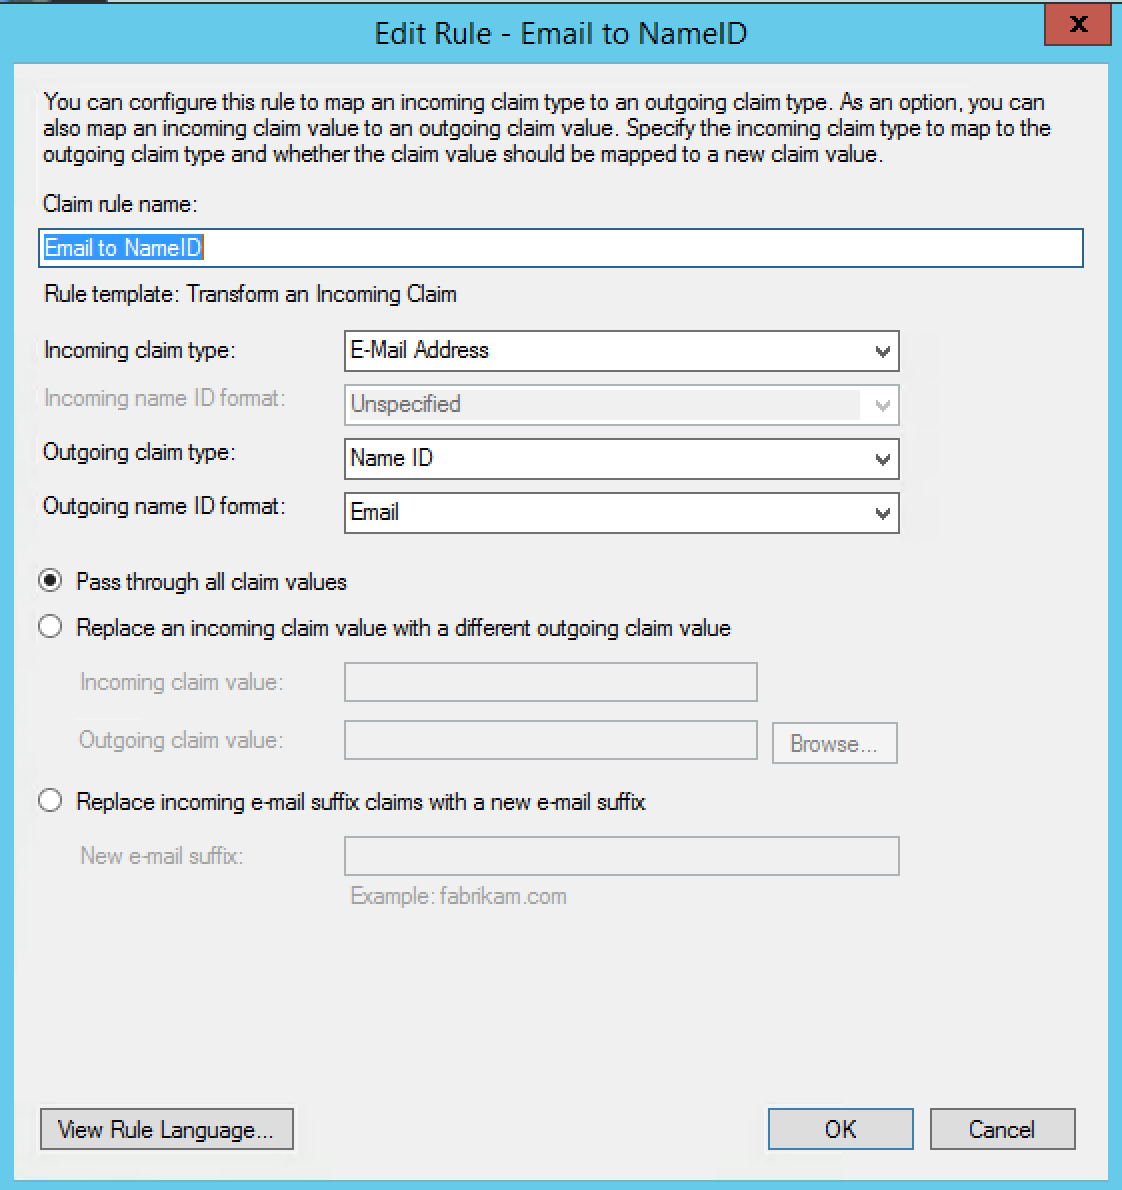
Click Finish
Last Steps...
Please send the link for your Federation Metadata Document to your TAM or to help@scuba.io (this link looks something like https://somedns/.../federationmetadata.xml). If you prefer, you can also send us the entire metadata file instead of sending a link to the hosted file.
What's Next
Don't forget to send us your Federation Metadata Document! Once we have that, we can get everything hooked up on our side. We will work with you to plan a time to switch over to the new authentication flow and have someone on your team validate that everything is working properly.