Set up the Working Environment
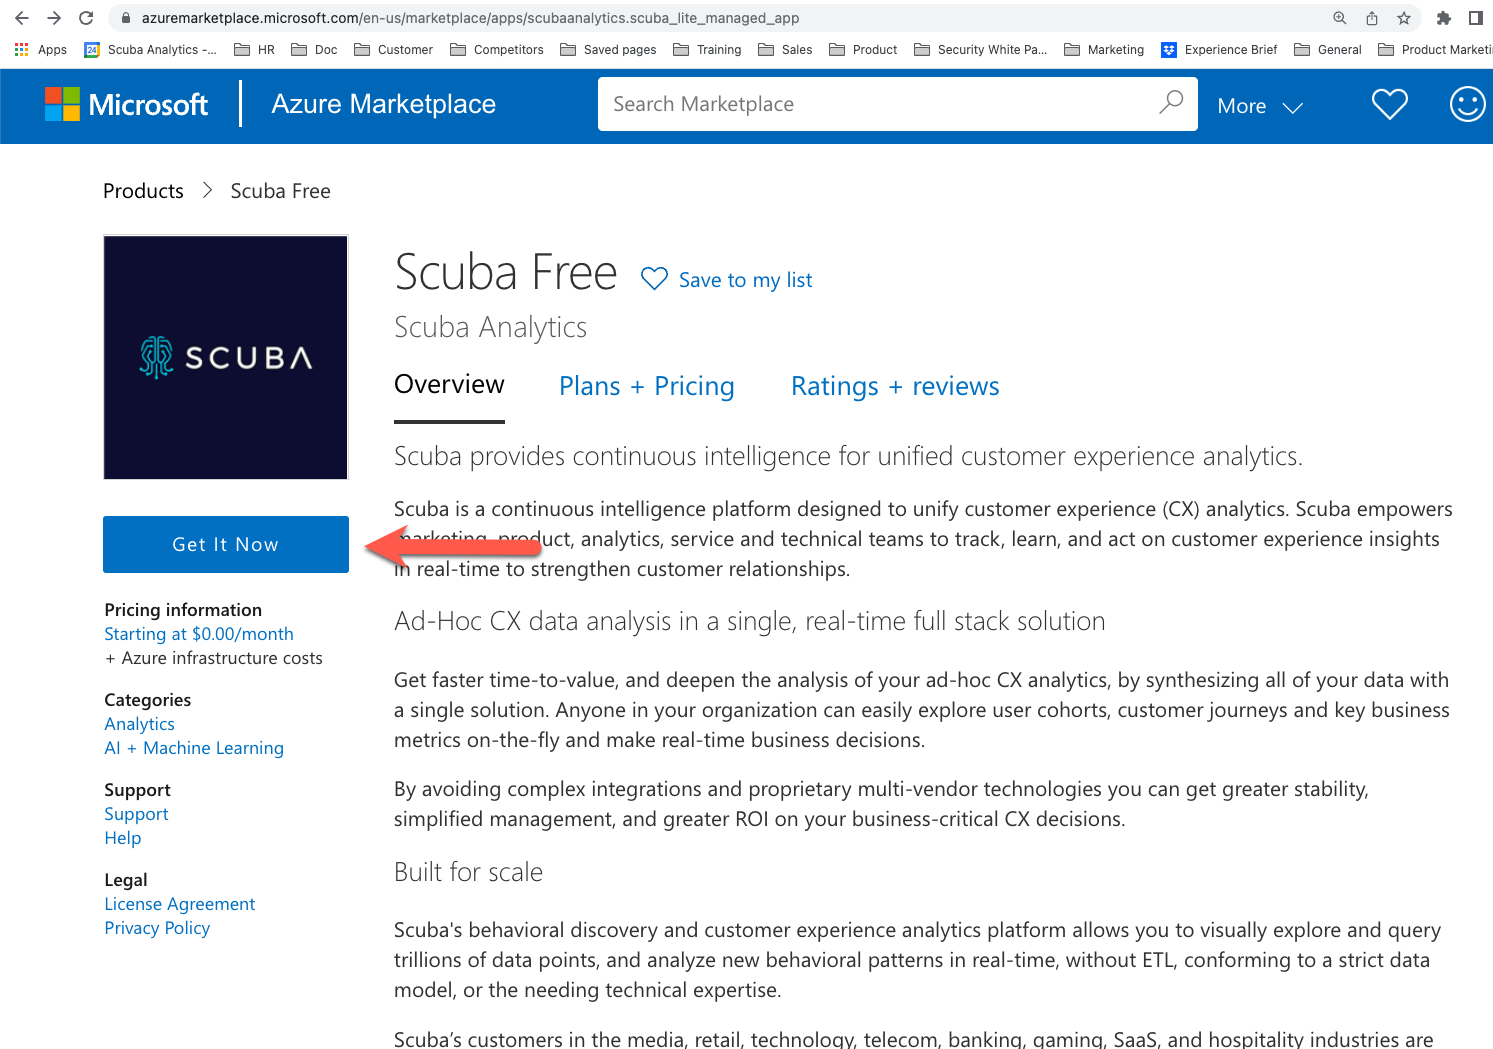
Click here to land the page of Scuba Lite on Azure Marketplace. Press the Get it Now button on the left.
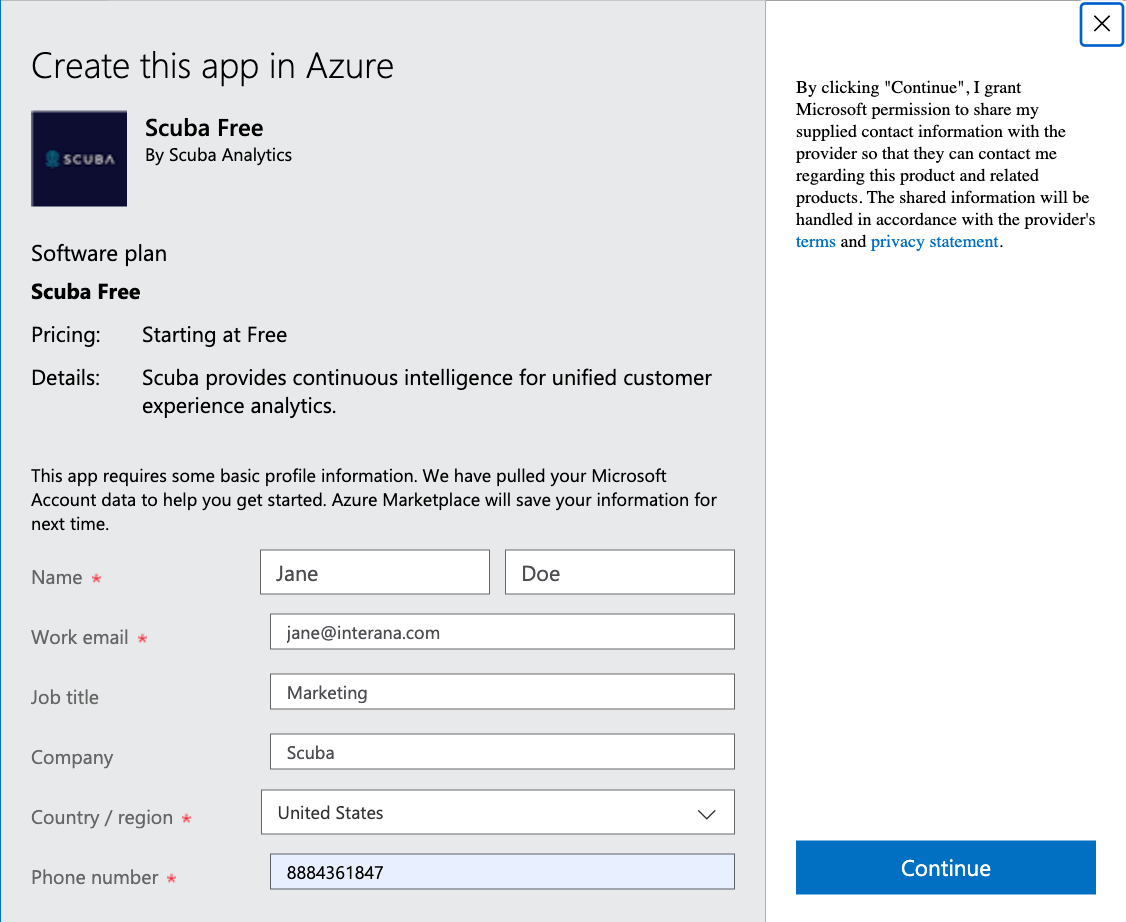
Fill out your information to create an app in Azure Marketplace.
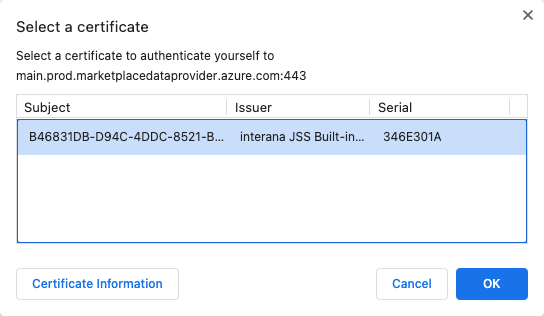
Select the certificate to approve the deployment authentication.
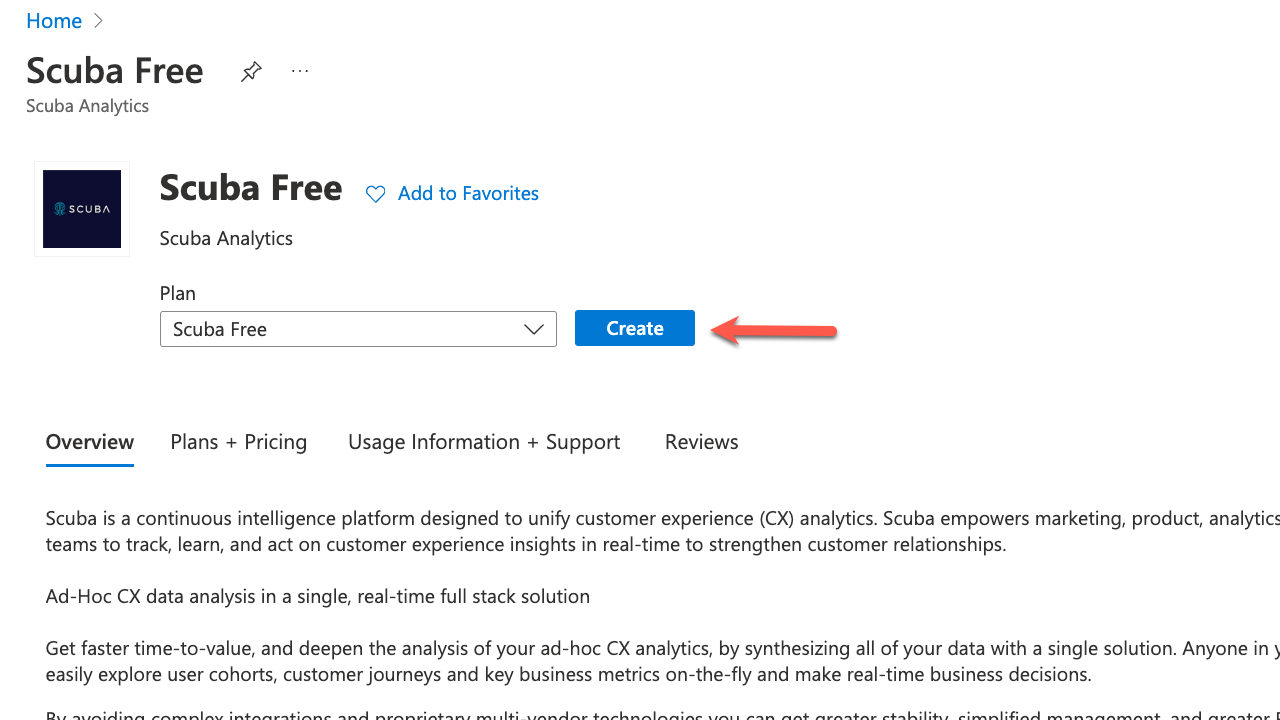
Click Create on the Screen to create a deployment of Scuba Lite.
Select your subscription. Note that all resources in an Azure subscription are billed together.
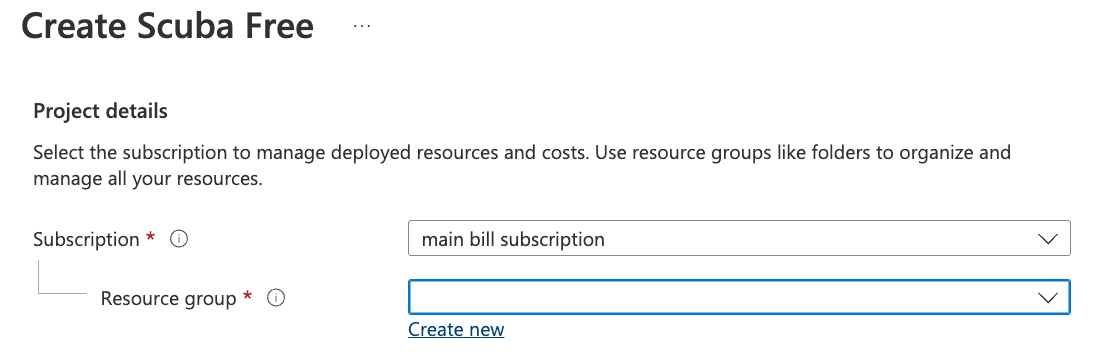
Click Create New or select an existing resource group from the dropdown.
A resource group is basically a collection of resources that exist in the same environment with a community or a company. This community could exist in the same lifecycle or exist in the same permission of policy. When you create a new resource group, your deployment will live in this resource group. A resource group is a collection of resources that exist in the same environment or department within a community or a company. This community could exist in the same lifecycle or exist in the same permission of policy. When you create a new resource group or be a part of an existing resource group, your deployment will live here.
Select the geographical region that is closest to your and your customer’s location. Note that availability of the resources are based on the region.
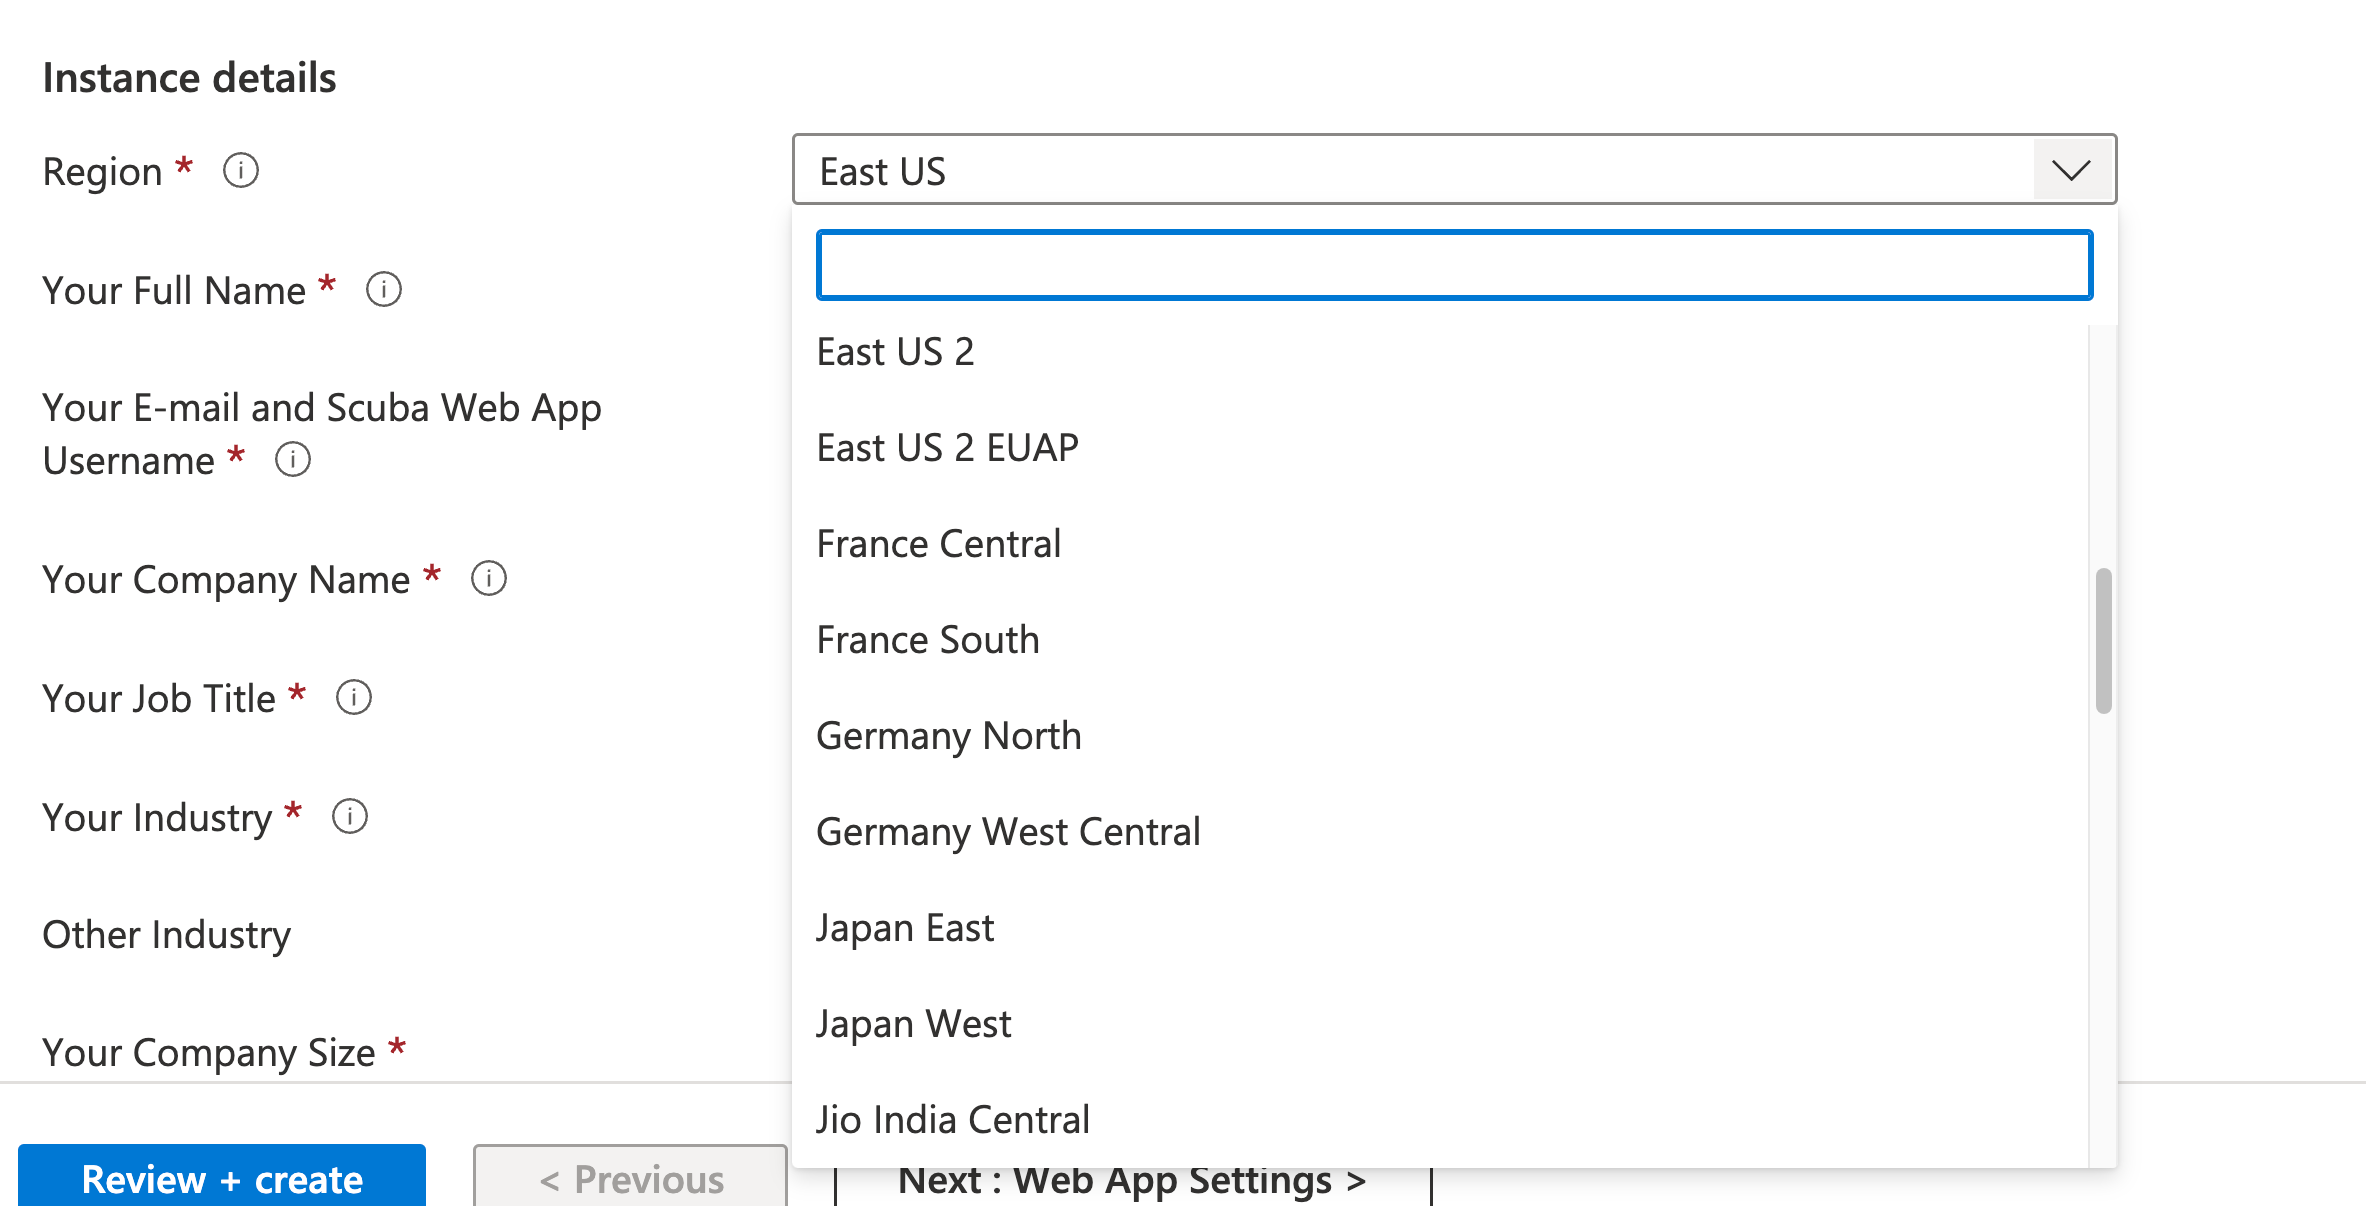
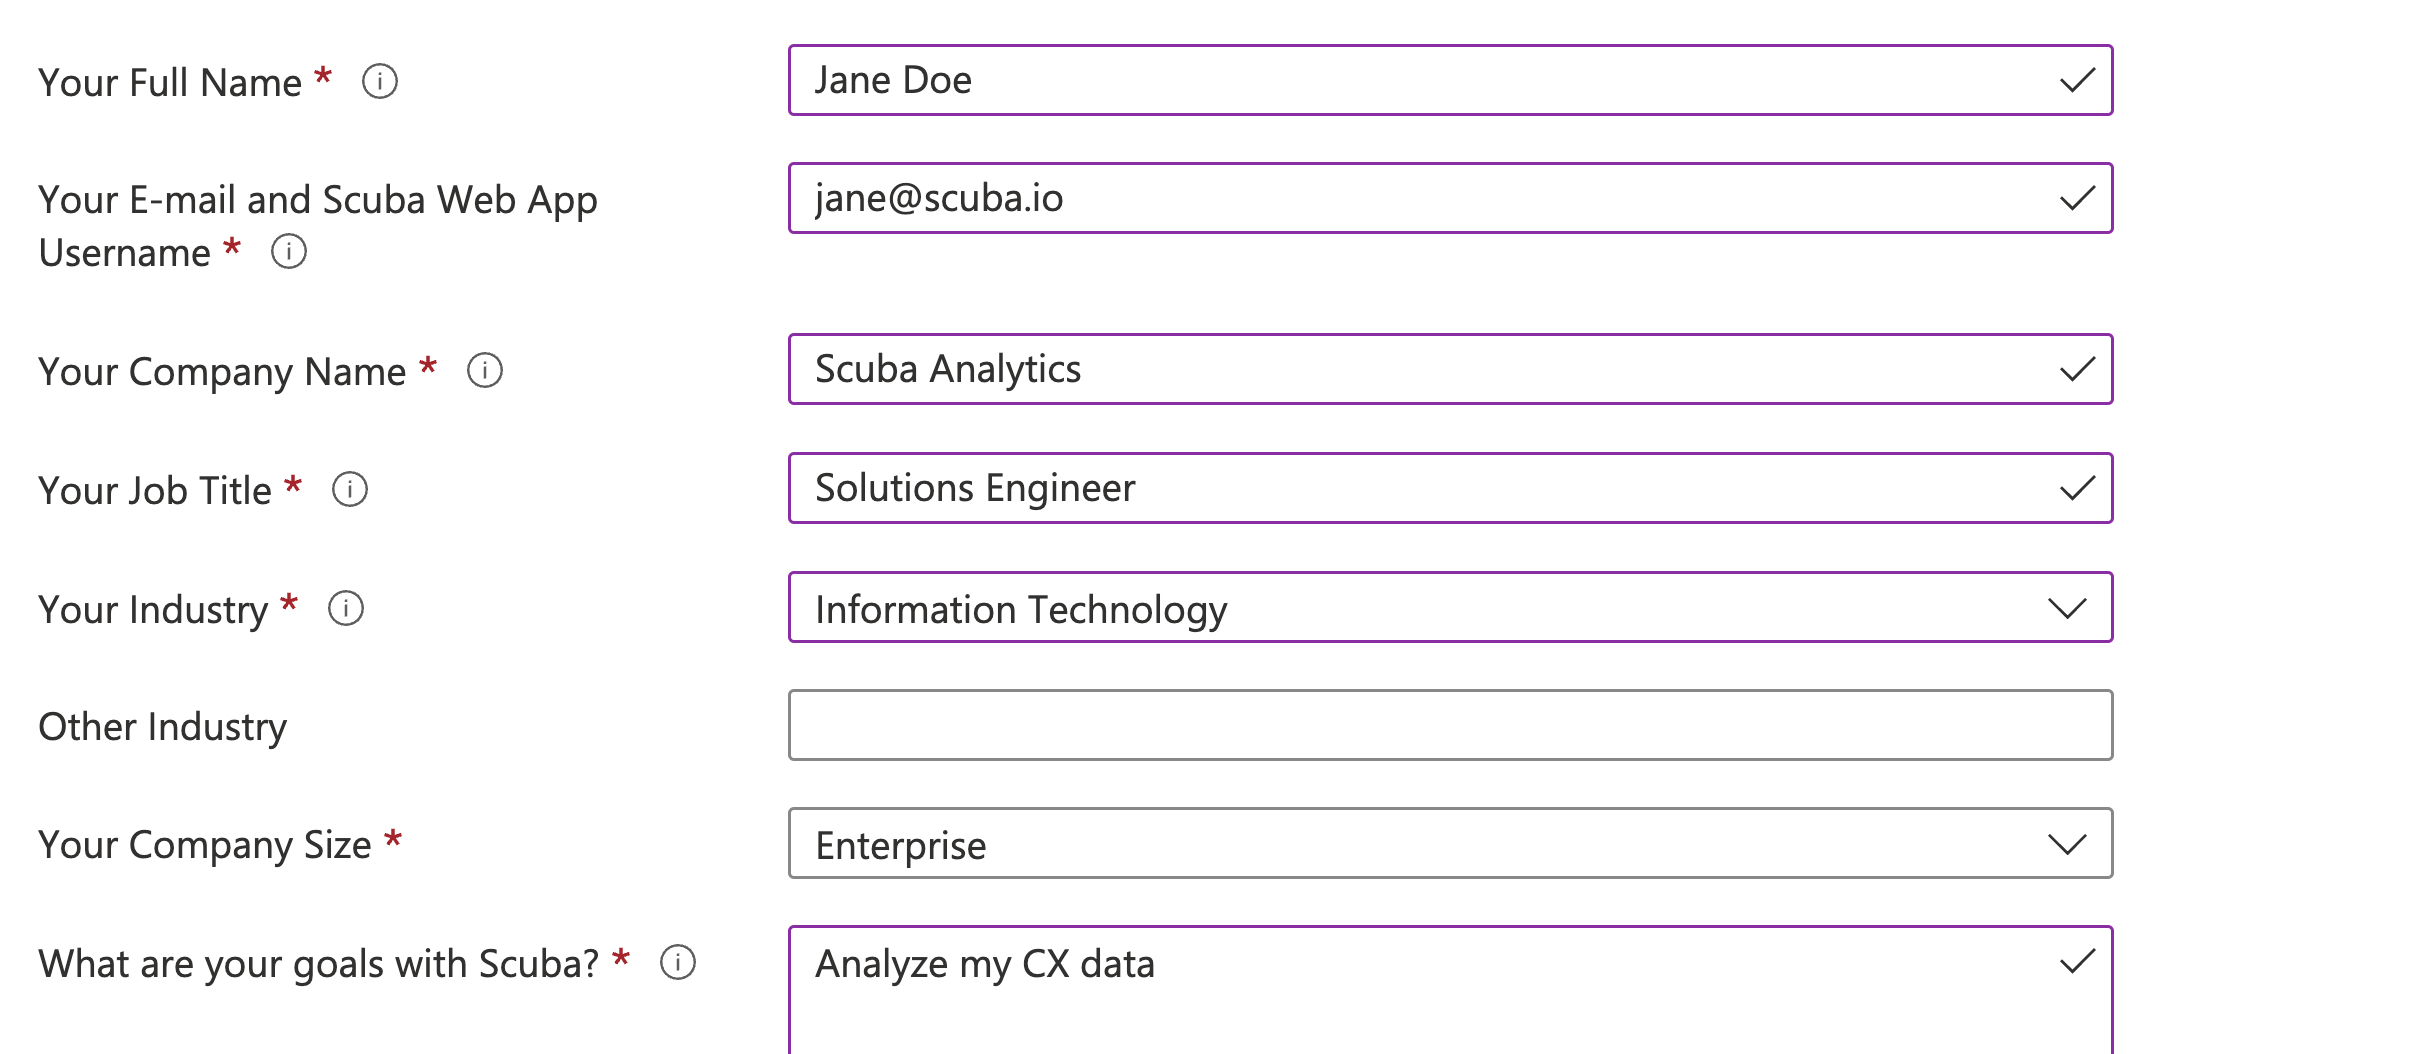
Enter you name, your email address, the company name, the industry of the company that you are working for, your job title. For us to help you better achieve your goals, tell us a bit about what you would like to do with Scuba.
Enter a descriptive name for your Scuba app deployment.
Note that the name must be between 3 to 20 characters in length, and it should only contain alphanumeric characters such as '-' or '_'. This name will be used in the URL of your Scuba deployment session and it will be combined with a unique identifier to form your public access URL.
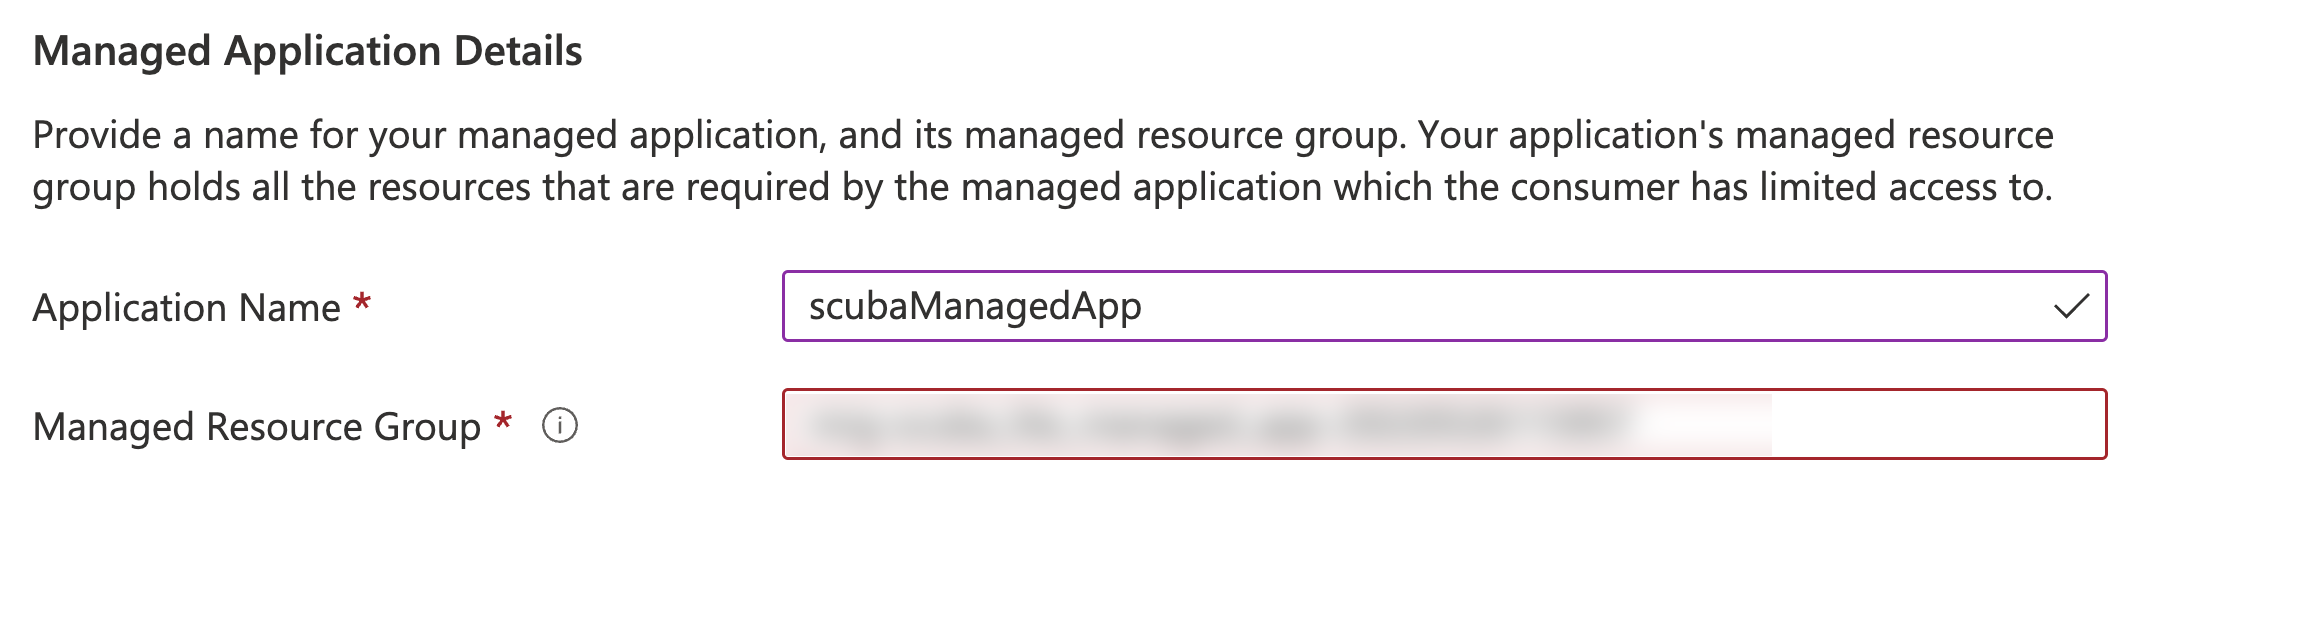
Enter an application name and a managed resource group.
Note that your application lives under the managed resources group and the users in the application only has a limited access to the resource group. To explain further, the managed resource group contains the virtual machines, storage accounts and virtual networks.
Click Next: Web App Settings
Now as the next step, select the app settings.